
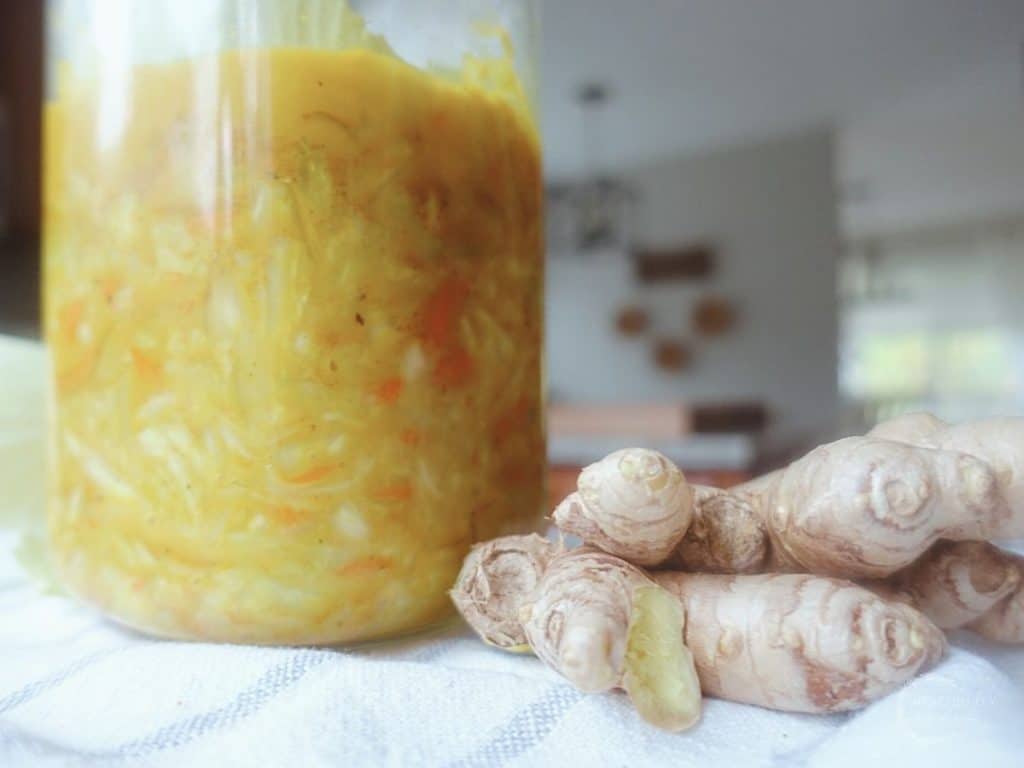
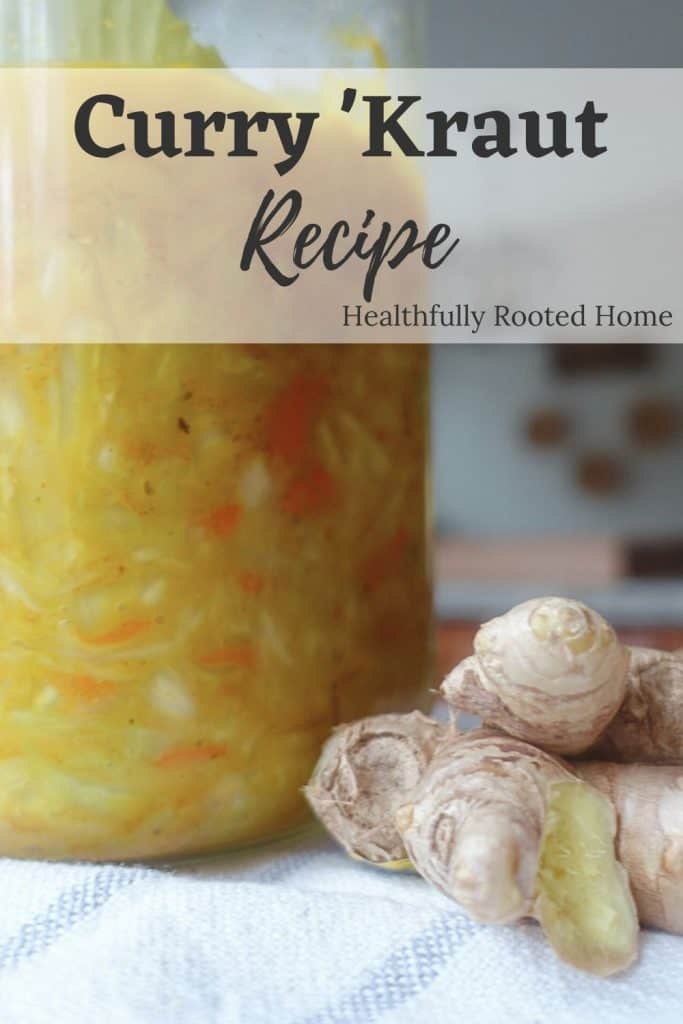
Curry Kraut Recipe
This curry kraut recipe is super easy but ridiculously flavorful and delicious. I’ve taught you how to lacto ferment regular kraut before, but never curry kraut. The process is pretty much the same as any lacto ferment, but you’re just adding a few extra ingredients to make the curry. Get ready for your house to smell like curry for a few days (don’t worry, it’s worth it).
Related: lacto fermented sauerkraut recipe
Related: Fermented apples
This post contains affiliate links, which means I make a small commission at no extra cost to you. See my full disclosure here.
What is curry kraut
Curry kraut is a type of sauerkraut – only, it’s made with ingredients to make it curry-style. Curry kraut has the same gut-healing benefits as any lacto fermented food and has a ton more flavor than traditional sauerkraut.
Curry kraut equipment
knife & cutting board
quart jar with an airtight lid
fermenting weight (or something heavy in a plastic bag to keep kraut below the brine)
a large non-reactive bowl to combine all ingredients
garlic press
cheese grater
Canning funnel (optional but so nice)
Curry Kraut ingredients
- 2 lb. organic cabbage head
- 2 tbs sea salt
- 1/2 cup yellow onion (thinly sliced)
- 1/2 cup carrot
- 6 cloves garlic minced
- 1/2 tbs ground coriander
- 1/2 tbs cumin
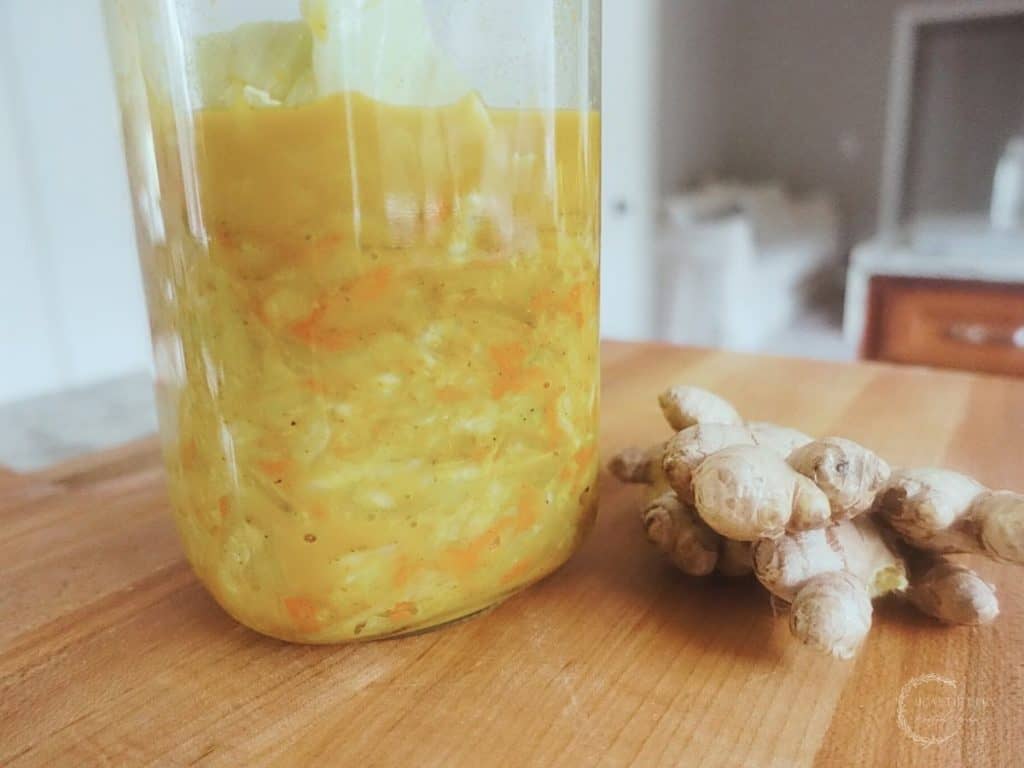
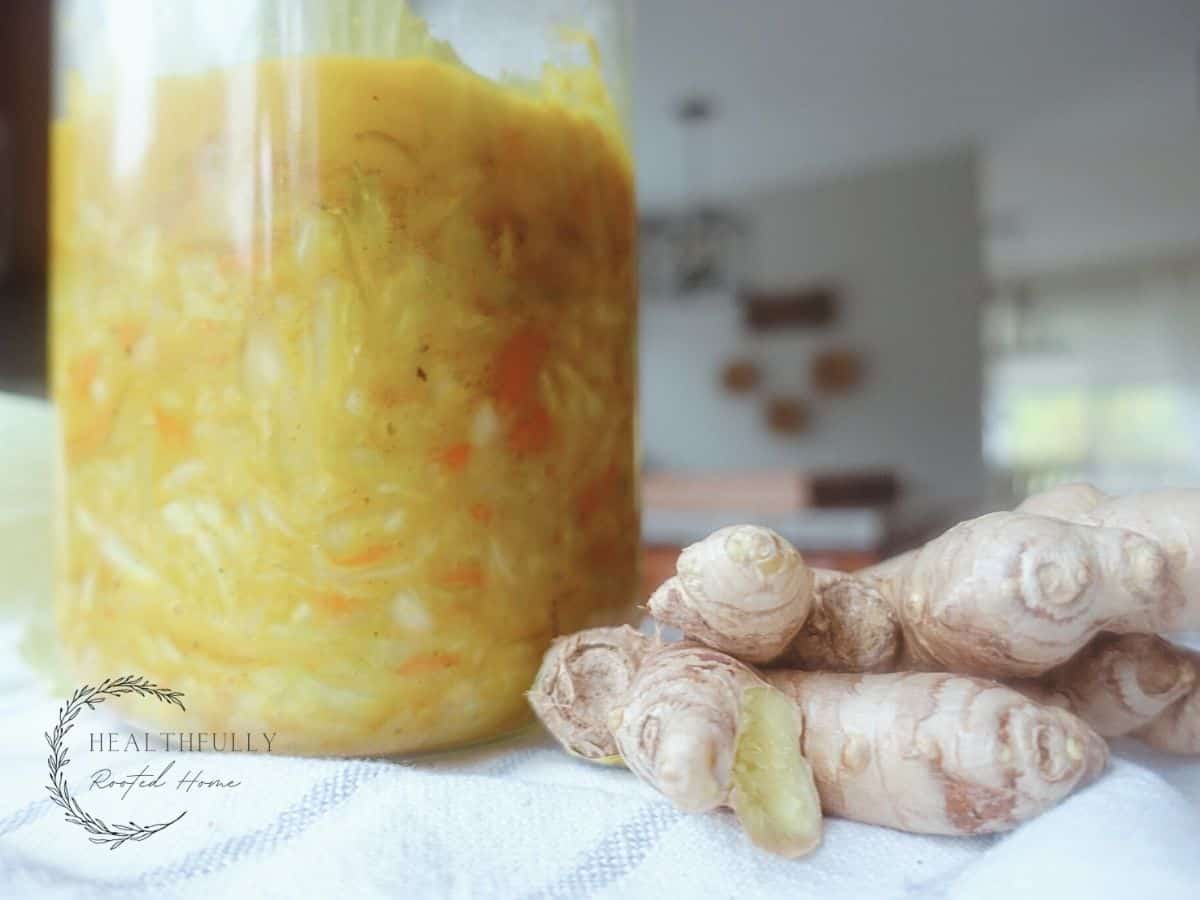
- 1 tbs fresh ginger (1 tsp ground powder alternative)
- 1/2 tsp ground cayenne pepper
- 1/4 tsp black pepper
- 1/2 tsp curry powder
- 1/2 tsp turmeric powder
- 1/4 tsp cinnamon
curry kraut tutorial
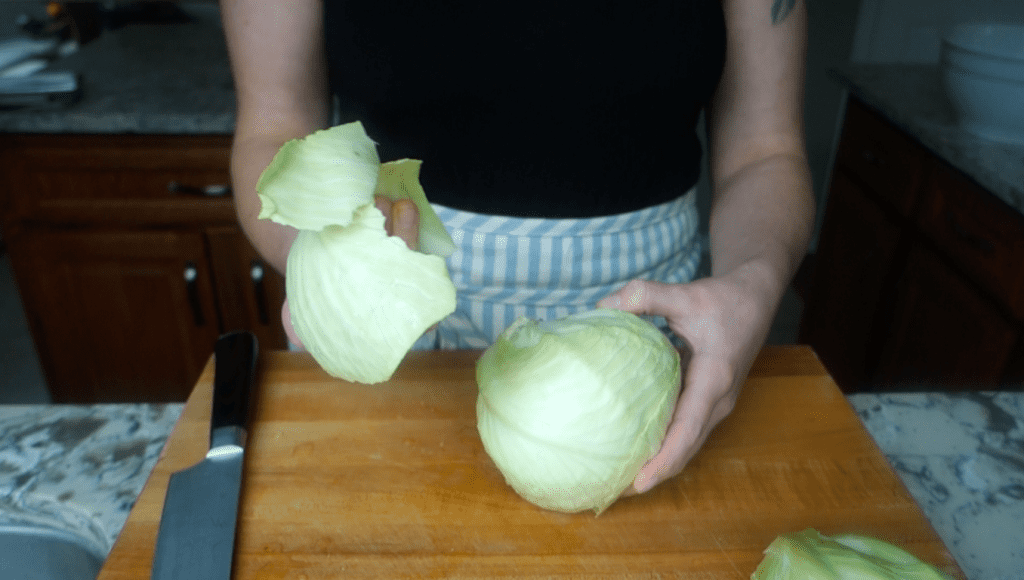
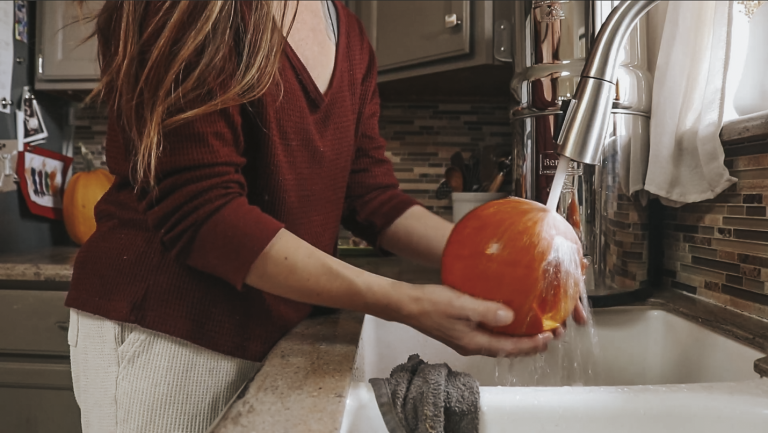
- First, rinse your produce.

- Then, peel the outer layers off the cabbage saving a couple of the cabbage leaves for later use.
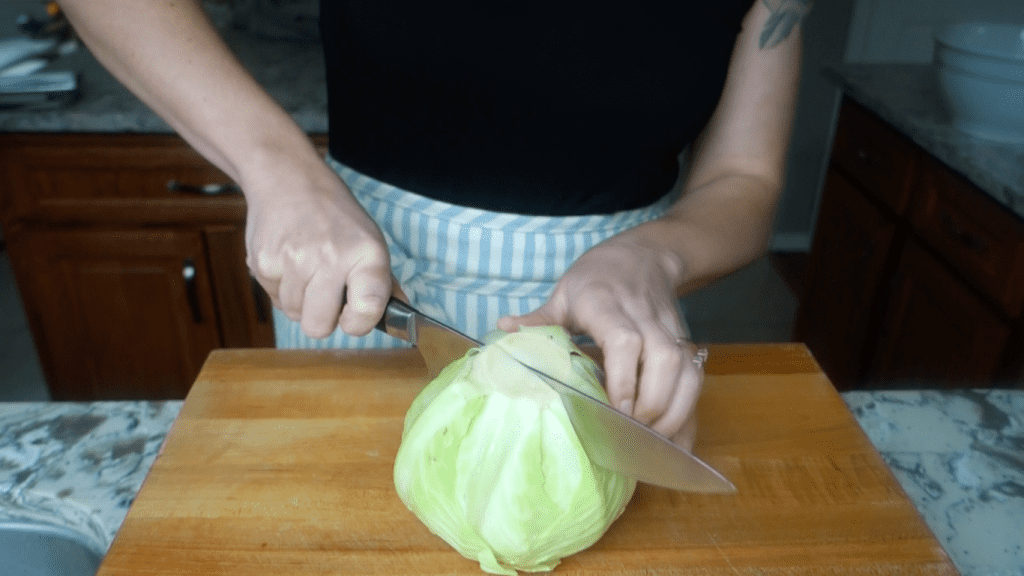
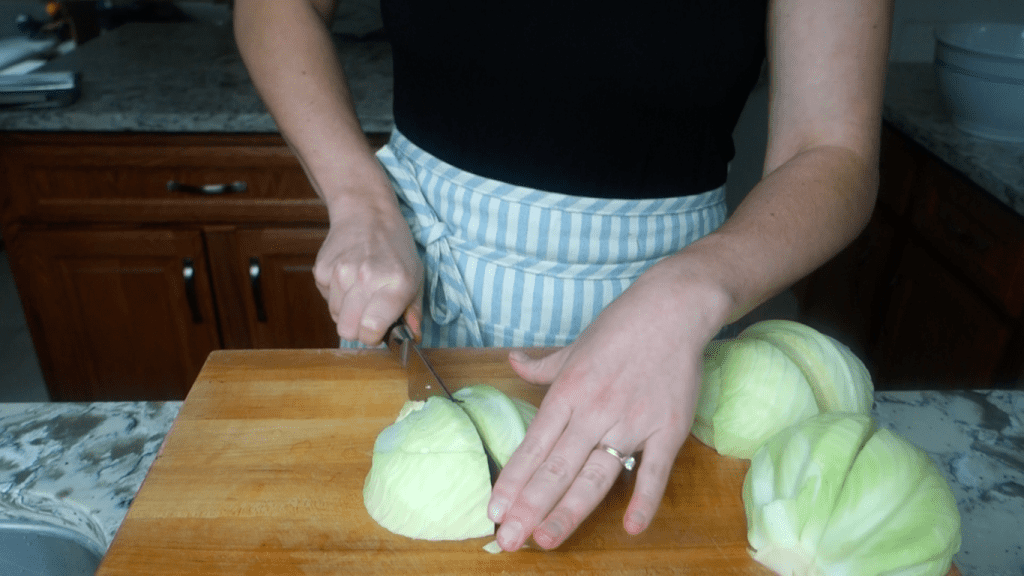
- Next, cut the cabbage in half (through the core), then in half again (so quarters), then core the cabbage. To core your cabbage, sit your wedges up vertically on your cutting board with the core touching the board and holding at the tip. Position your knife at the start of the core and slice downward cutting off that hard portion.
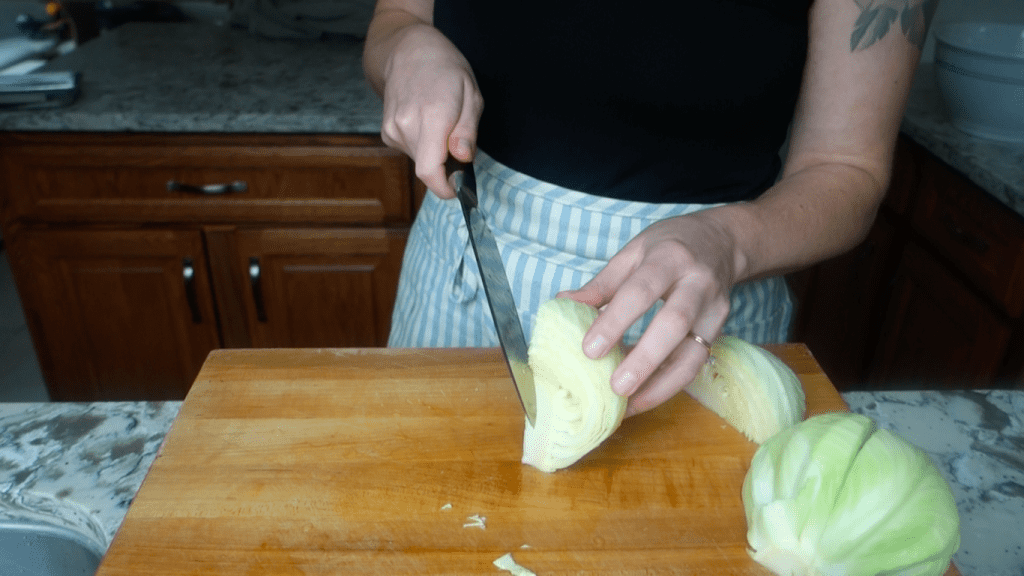
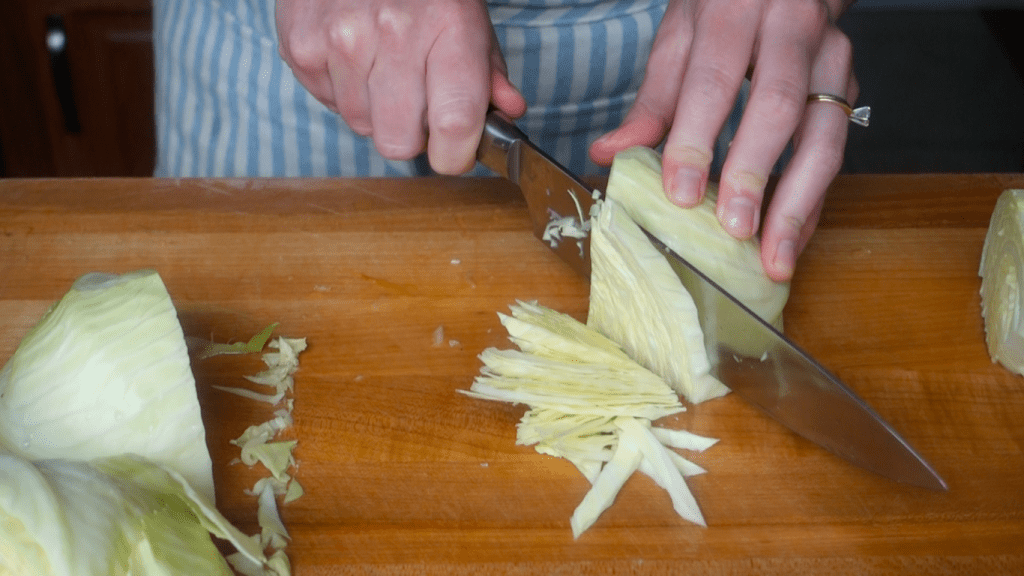
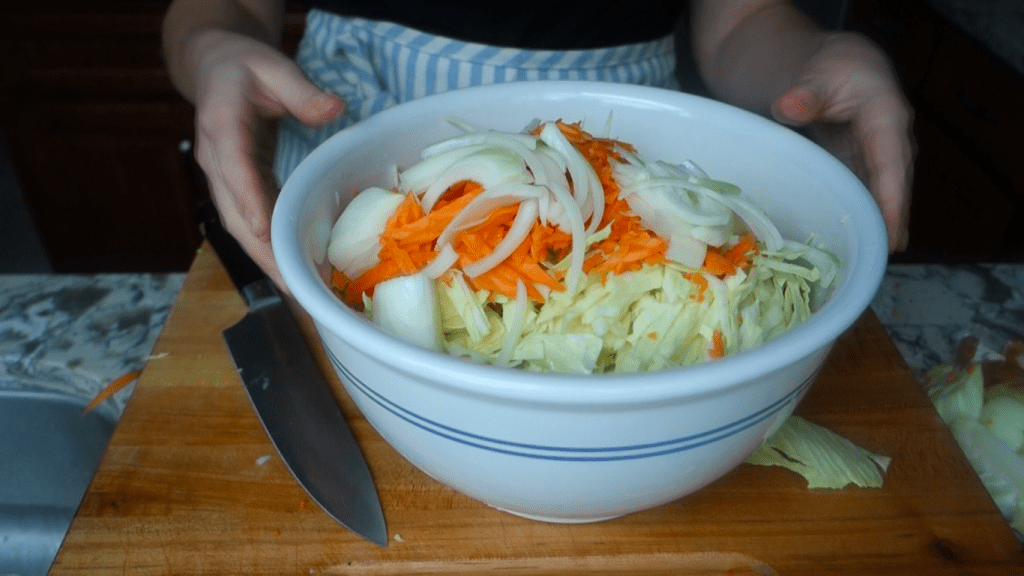
- After that, lie your cabbage on a flat side and slice shreds to desired thickness (I like about 1/4 inches). Start at the tip working your way down.
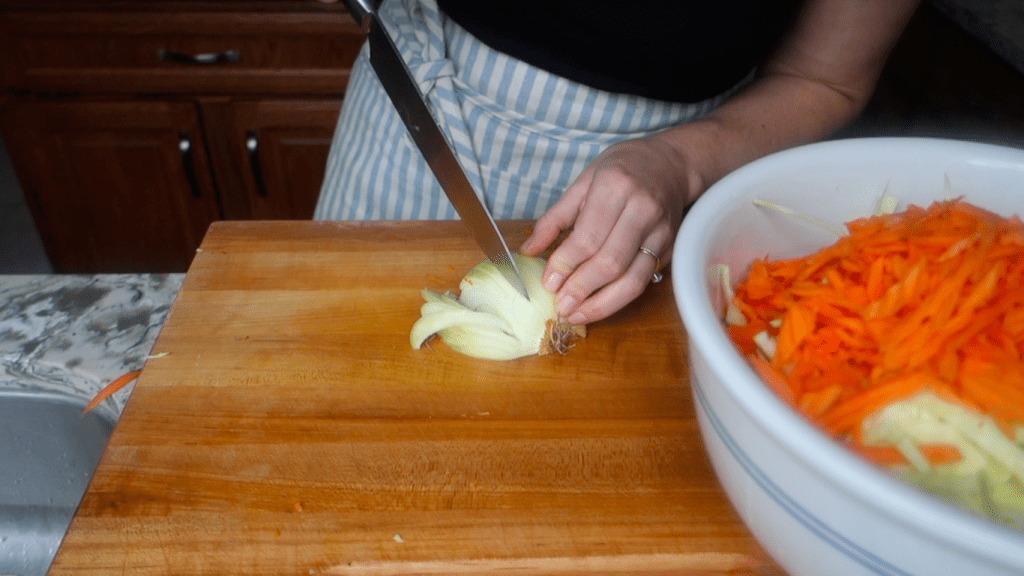
- Then thinly slice your onion and then shred your carrot using a cheese grater.
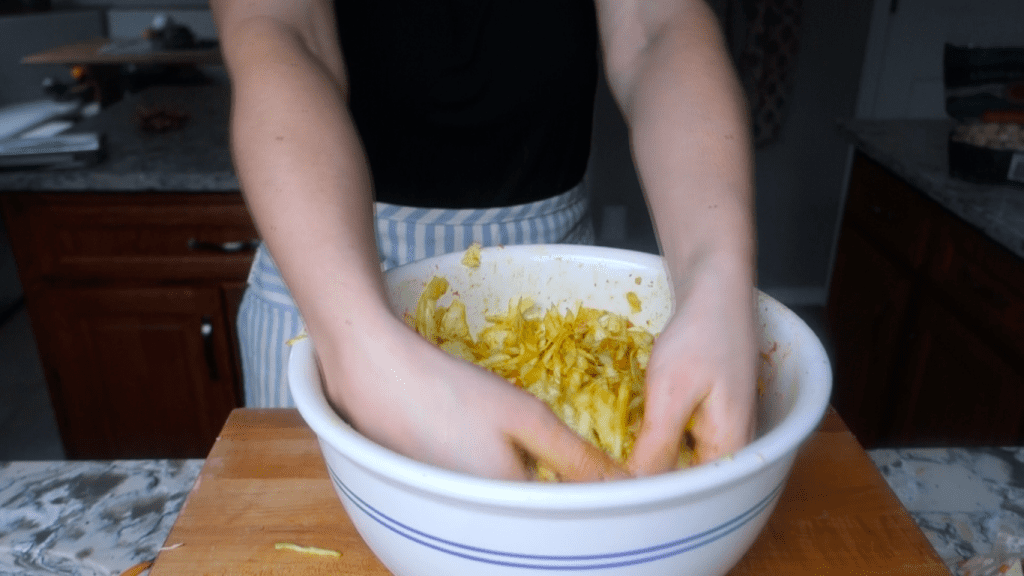
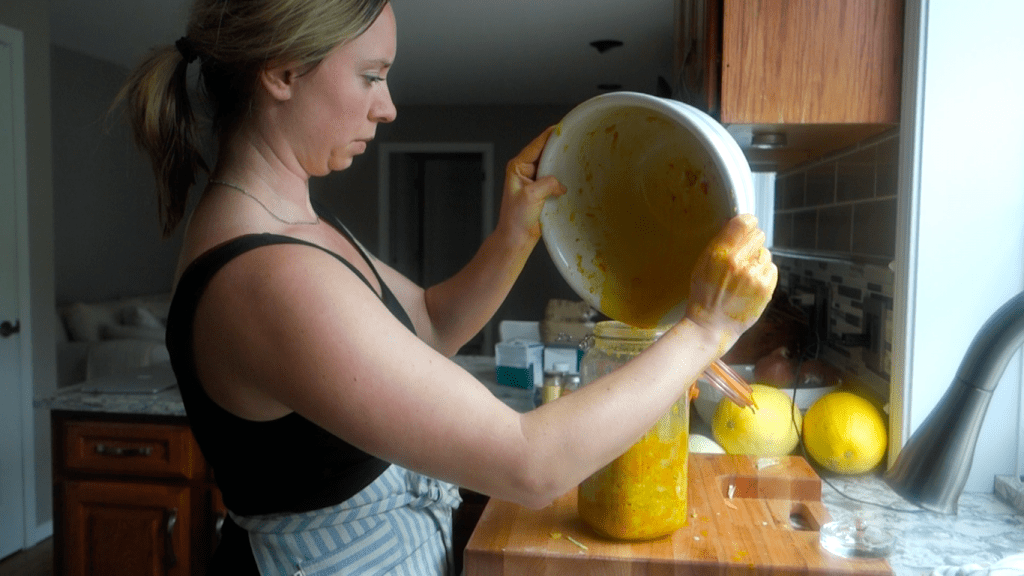
- Once everything is sliced and shredded place it all into a very large (sometimes 2) non-reactive bowl (not metal).
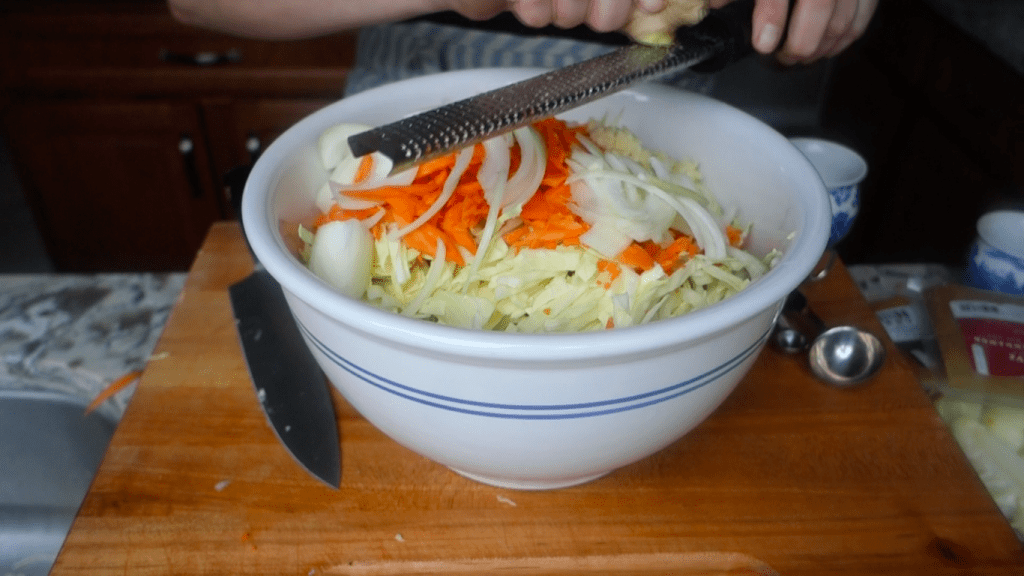
- Using a microblade zester, or a cheese grater (smallest side) grate your ginger root. I keep the skin on to add more flavor and nutrients but you can peel if you prefer.
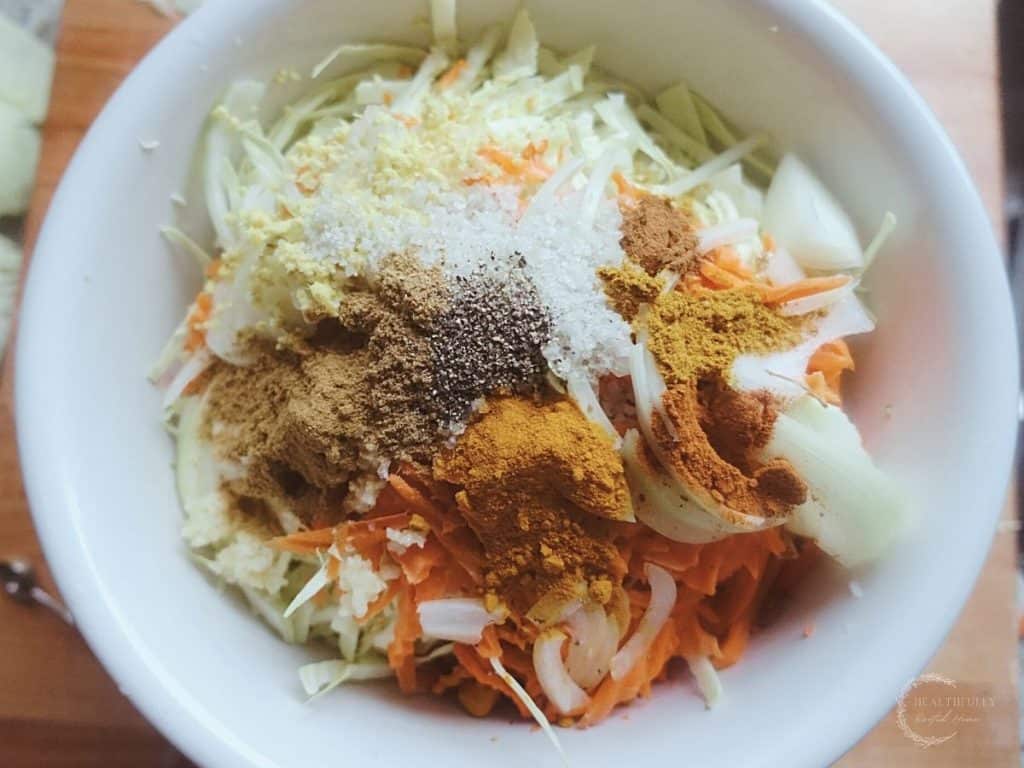
- Then, pour your spices on top of your veggies.
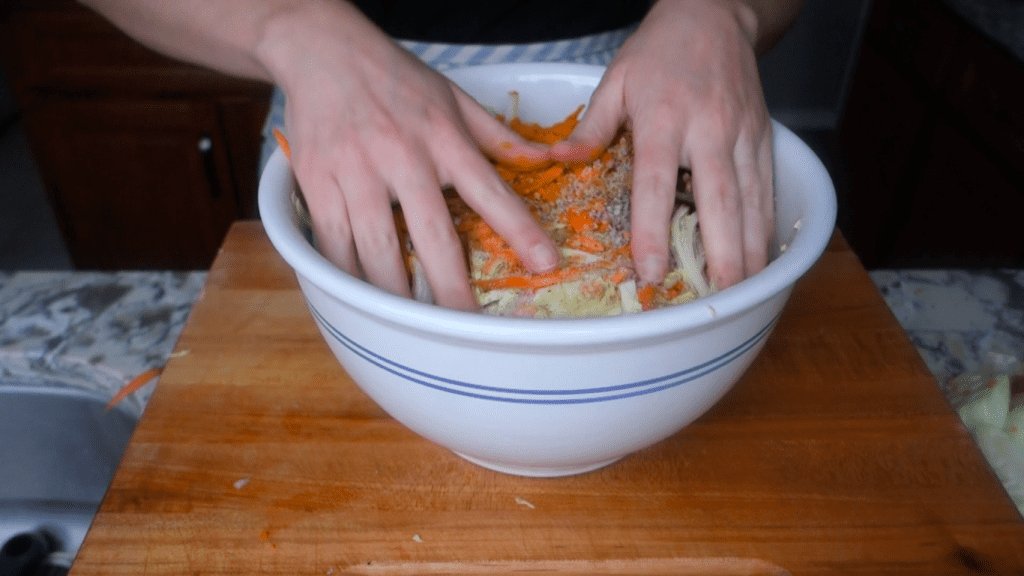
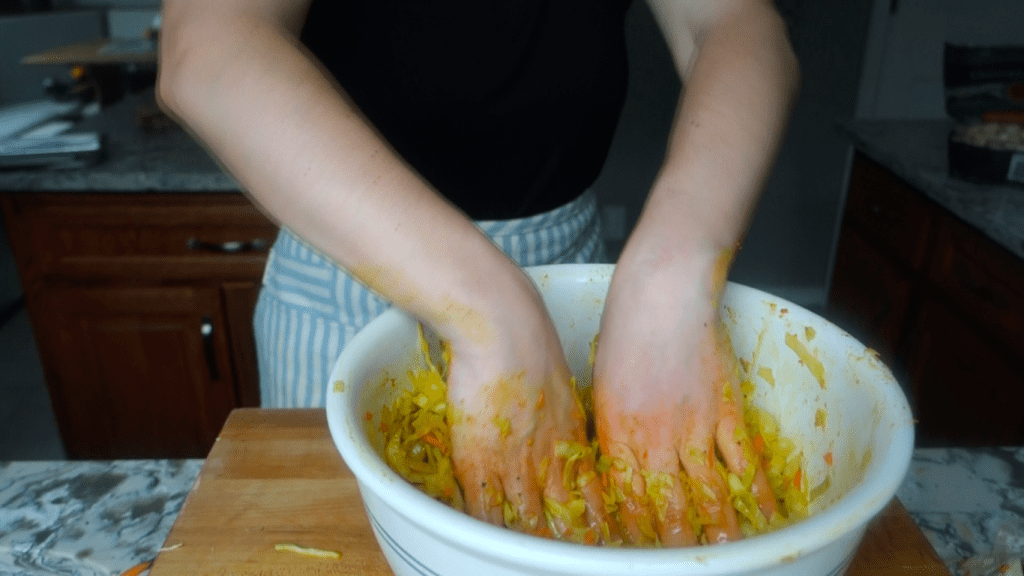
- Start massaging the mixture of veggies and spices with your hands. Massage until you create a lot of brine and the mixture has shrunk down to about half the size.
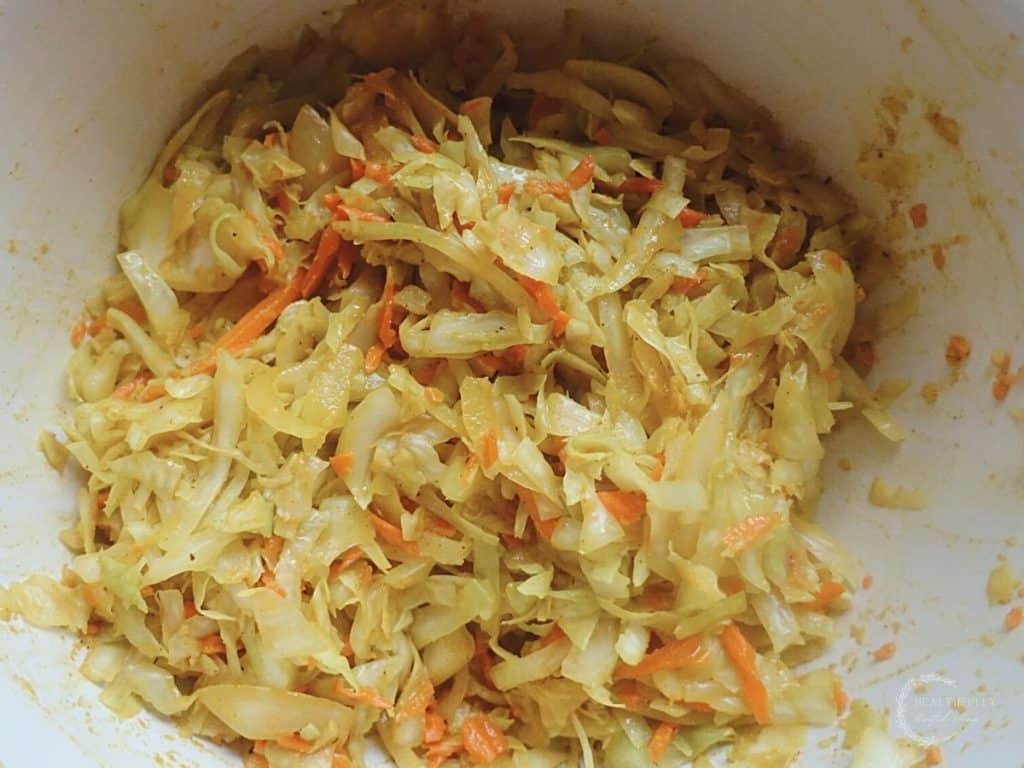
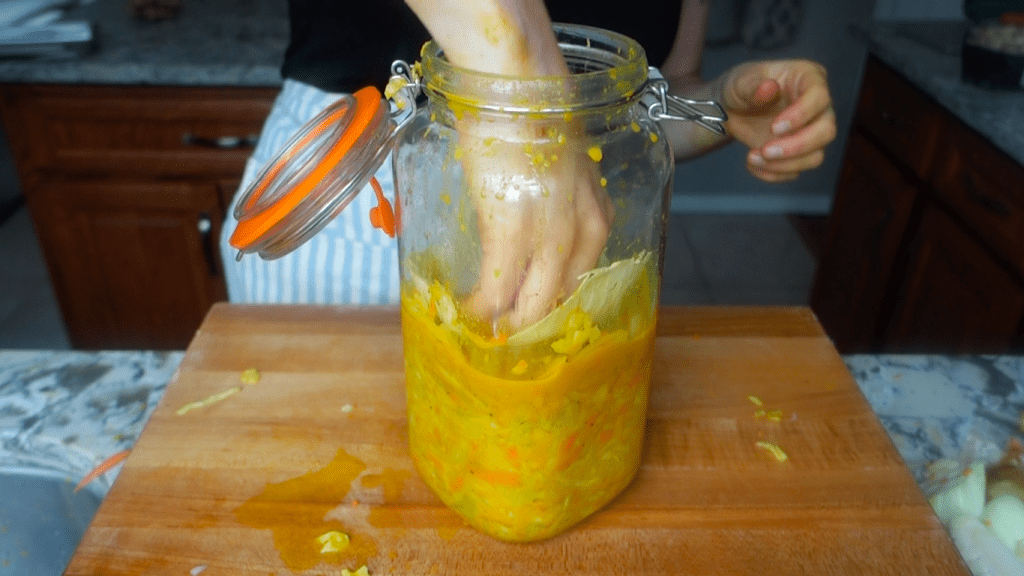
- After that, take your massaged veggies and spices and start packing them into your fermenting jar. The packing will help to bring the brine to the surface. After every few scoops you put into the jar, pack it down with your fist. Leave several inches at the top of the jar.
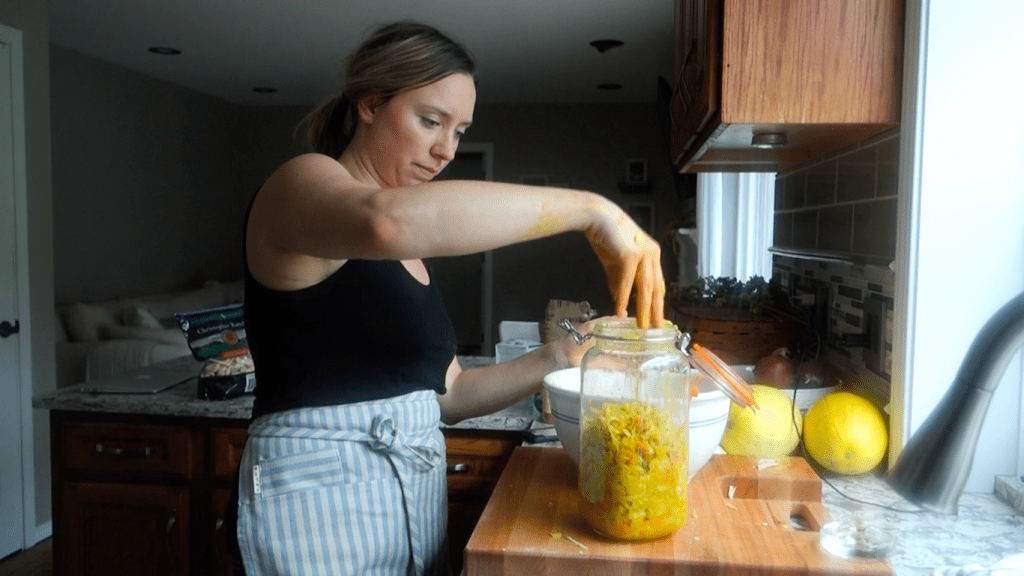
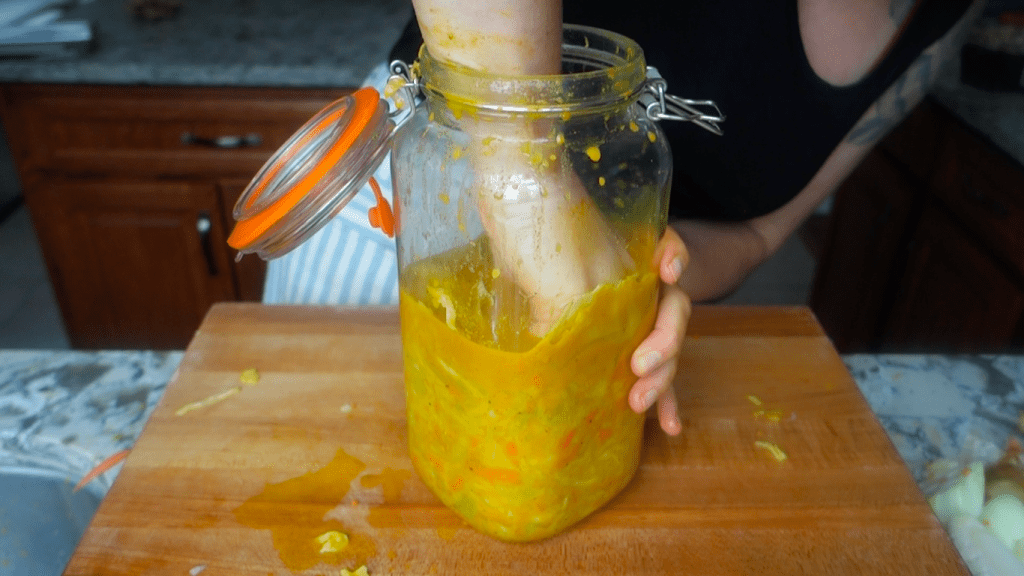
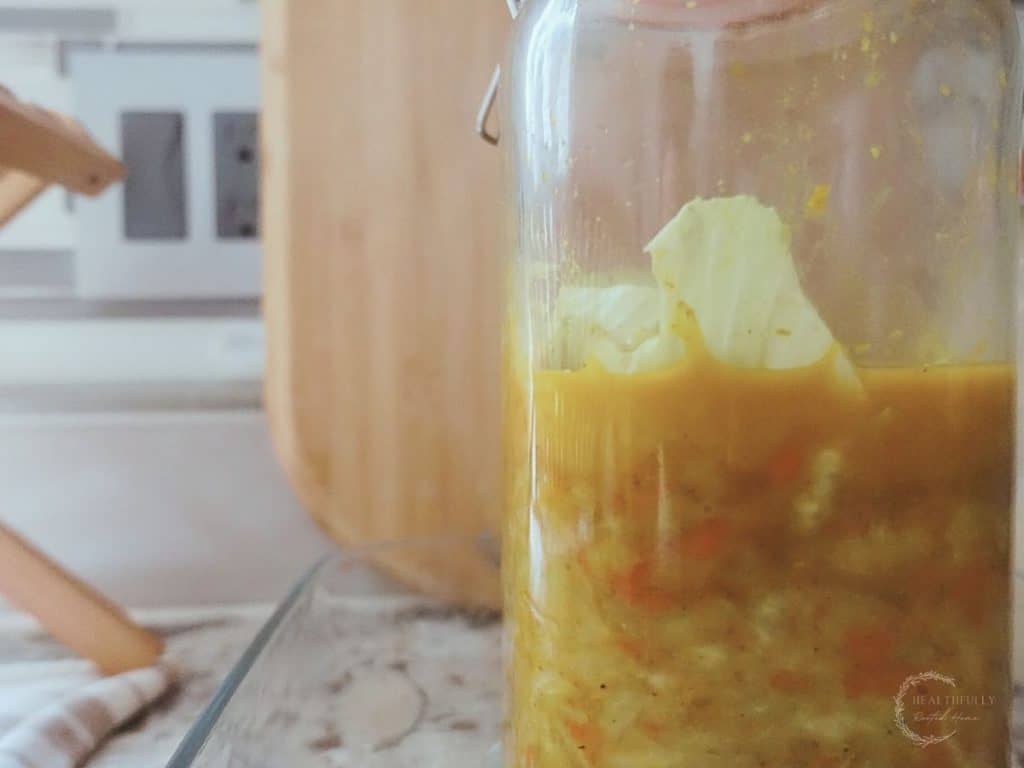
- Take the cabbage leaf you saved, fold them up, and put them on top of your cabbage in the jar. Make sure the brine comes over the top of the cabbage leaf. Then place the weight (either a fermenting weight or rocks inside of a bag) on top of the cabbage leaf. Leave about 1-2 inches at the top of the jar.
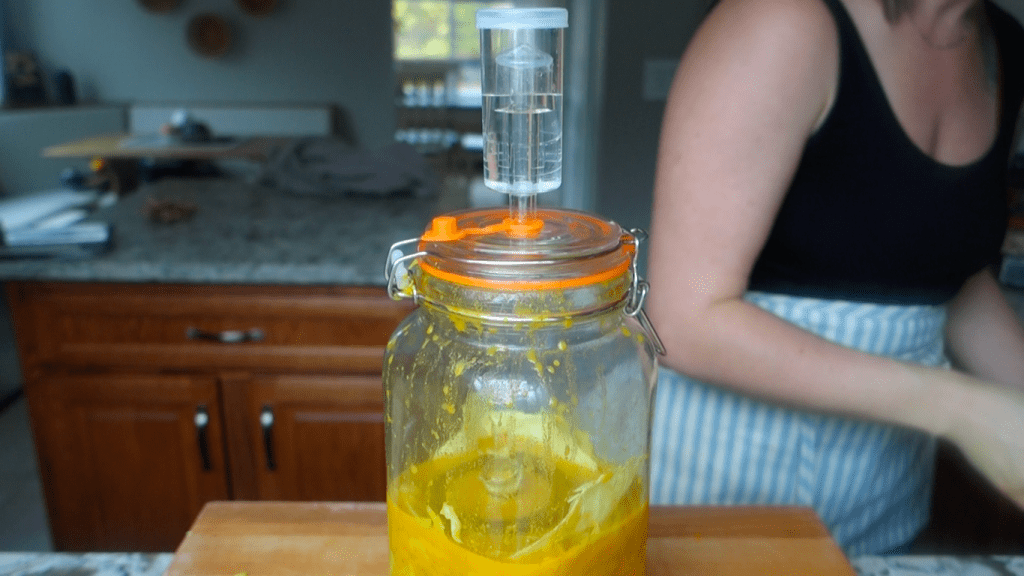
- Close the jar’s lid and put the jar(s) in some sort of basin (I use a casserole dish) to catch the brine that comes out. The brine will come out of your jars because the cabbage will swell during the fermentation process and the basin will catch the brine instead of spilling onto your counters.
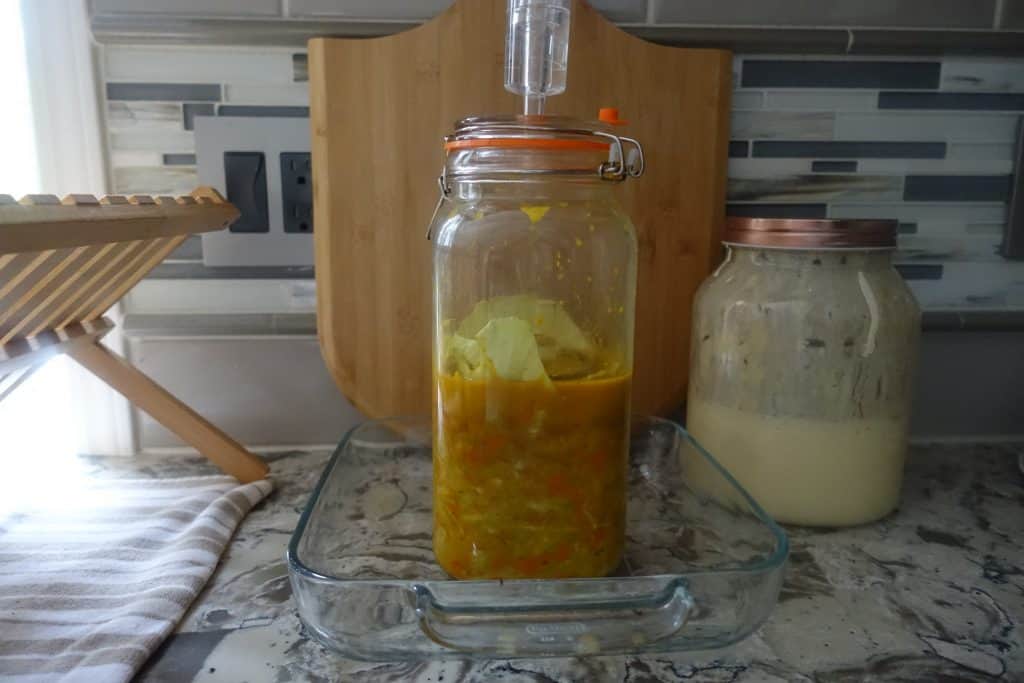
- Over the next few days, you’ll see the mixture start turning into the best curry kraut ever through the lacto fermentation process! You’ll see bubbles and the bright green cabbage turn into a yellow color.
- How long you wait depends on how sour you like your kraut and how warm you keep your house.
- After a few days, check the curry kraut for taste. I like to check after about 3-5 days to see if it’s sour enough for me. I also do a quick check for mold. You’ll likely see a white scummy-type substance at the top of the brine – this is ok and part of the process. You can scrape it off or leave it.
- When your curry kraut tastes how you like it, take out the cabbage leaves and the weight, close the lid, and put it in the fridge.
curry kraut tips
- Don’t use a reactive bowl when massaging curry kraut. A reactive bowl, like metal, can ruin the fermentation process.
- Use organic produce. Pesticides can negatively affect the ferment.
- Use high-quality sea salt. You want no additives in the salt. Table salt is virtually devoid of nutrients and sea salt has many beneficial trace minerals.
- Keep the kraut under the brine. If any bits of kraut are above the brine it may mold.
- If you need to top-off the brine with filtered water, do so. We use a Berkey water filter and love it!
- Leave a little place (1-2 inches) above the fermentation weights to allow the cabbage to swell.
- Keep your house around 65-73 degrees for a successful ferment.
Health benefits of curry kraut
- Nutrients – Lacto fermentation produces probiotics which are healthy for your gut. There are tons of vitamins and minerals in curry kraut as well which are even enhanced through the lacto fermentation method.
- Immunity – curry kraut may even boost your immune system. The immune boosting nutrients in curry kraut are probiotics, vitamin c and iron.
- Heart healthy. The blend of vitamin k2, fiber and probiotics help lower cholesterol and blood pressure.
- Flavorful. Curry kraut is so flavorful and delicious – if you aren’t a fan of sauerkraut, you might just like the curry flavor of curry kraut.
I list tons more health benefits in my Lacto Fermented Sauerkraut post
How long to ferment curry kraut
Using lacto fermentation, how long you ferment the vegetables depends on how sour you like it and the environment in which you’re fermenting. The longer you ferment, the more sour your curry kraut will be; the warmer your house, the quicker your curry kraut will ferment. I start with a 3-day ferment, taste, and decide if it’s sour enough. I usually ferment for up to a week.
shop this post
(These affiliate links help to support this blog at no extra cost to you. Your support means the world to me!)
- Fermenting kit
- a large non-reactive bowl to combine all ingredients
- garlic press
- cheese grater
- Canning funnel (optional but so nice)
- Berkey water filter (we use the Royal because we drink an insane amount of water!)
- Thrive Market – 25% off & free gift! (where I get a ton of my ingredients)
- Azure Standard: $25 off your order. Code kyrieluke1
- Dutch oven
- Stand mixer
- Boos Block Butcher Block
- 12 inch Cast Iron Skillet
more fermented recipes
The Best Lacto Fermented Sauerkraut
Roasted Garlic Sourdough Bread
Pumpkin Sourdough Cinnamon Rolls
Sourdough Starter from Scratch
free homestead living ebook – harvest edition

kraut faq
Sauerkraut, while rich in probiotics, vitamin K2, many and other nutrients is very good for you. Eating sauerkraut can help your digestion, weight loss, leaky gut, among other benefits.
Sauerkraut is perfectly fine to eat while pregnant and breastfeeding. Of course, you’ll want to confirm with your provider. Sauerkraut is great for mama as her digestion slows down due to pregnancy. Sauerkraut is rich in iron which is great for both mama and baby and the vitamin c in sauerkraut helps to absorb the iron. Sauerkraut is also rich in folate – that brain-building vitamin crucial for baby.
The healthiest way to eat sauerkraut is cold (so the heat doesn’t kill off the probiotics) and you’ll want to eat about a tablespoon per day.
Using lacto fermentation, you can make sauerkraut simply by using shredded cabbage and some salt to create a brine – then ferment it on your counter for several days or weeks.
It takes a very long time for sauerkraut to go bad when stored correctly. Some people say sauerkraut isn’t fully mature until about 6 months. However, if not made or stored correctly, mold can easily form on sauerkraut.
Sauerkraut can last many months when stored correctly in the fridge.
Sauerkraut does contain probiotic bacteria which improve digestion and therefore, could make you poop.
Sauerkraut may give you gas if you’re not used to fermented foods. Once your body has become more accustomed to the good bacteria, the gas should taper off.
Eat sauerkraut cold for the most health benefits. If you heat sauerkraut up it could kill off many of the good probiotic bacteria present.
Pin it for later – Curry Kraut Recipe
Related: fermenting fruits tutorial
print the curry kraut recipe
Curry Kraut
Ingredients
Equipment
Method
- First, rinse your produce.
- Then, peel the outer layers off the cabbage saving a couple of the cabbage leaves for later use.
- Next, cut the cabbage in half (through the core), then in half again (so quarters), then core the cabbage. To core your cabbage, sit your wedges up vertically on your cutting board with the core touching the board and holding at the tip. Position your knife at the start of the core and slice downward cutting off that hard portion.
- After that, lie your cabbage on a flat side and slice shreds to desired thickness (I like about 1/4 inches). Start at the tip working your way down.
- Then thinly slice your onion and then shred your carrot using a cheese grater.
- Once everything is sliced and shredded place it all into a very large (sometimes 2) non-reactive bowl (not metal).
- Then, pour your spices on top of your veggies.
- Start massaging the mixture of veggies and spices with your hands. Massage until you create a lot of brine and the mixture has shrunk down to about half the size.
- After that, take your massaged veggies and spices and start packing them into your fermenting jar. The packing will help to bring the brine to the surface. After every scoop you put into the jar, pack it down with your fist. Leave several inches at the top of the jar.
- Take the cabbage leaf you saved, fold them up, and put them on top of your cabbage in the jar. Make sure the brine comes over the top of the cabbage leaf. Then place the weight (either a fermenting weight or rocks inside of a bag) on top of the cabbage leaf. Leave about 1-2 inches at the top of the jar.
- Close the jar’s lid and put the jar(s) in some sort of basin (I use a casserole dish) to catch the brine that comes out. The brine will come out of your jars because the cabbage will swell during the fermentation process and the basin will catch the brine instead of spilling onto your counters.
- Over the next few days, you’ll see the mixture start turning into the best curry kraut ever through the lacto fermentation process! You’ll see bubbles and the bright green cabbage turn into a yellow color.
- How long you wait depends on how sour you like your kraut and how warm you keep your house.
- After a few days, check the curry kraut for taste. I like to check after about 3-5 days to see if it’s sour enough for me. I also do a quick check for mold. You’ll likely see a white scummy-type substance at the top of the brine – this is ok and part of the process. You can scrape it off or leave it.
- When your curry kraut tastes how you like it, take out the cabbage leaves and the weight, close the lid, and put it in the fridge.
Notes
curry kraut tips
- Don’t use a reactive bowl when massaging curry kraut. A reactive bowl, like metal, can ruin the fermentation process.
- Use organic produce. Pesticides can negatively effect the ferment.
- Use high-quality sea salt. You want no additives in the salt. Table salt is virtually devoid of nutrients and sea salt has many beneficial trace minerals.
- Keep the kraut under the brine. If any bits of kraut are above the brine it may mold.
- If you need to top-off the brine with filtered water, do so.
- Leave a little place (1-2 inches) above the fermentation weights to allow the cabbage to swell.
- Keep your house around 65-73 degrees for a successful ferment.
about me


So good!
Absolutely delicious. I used Napa Cabbage.
Sounds amazing! Good job fermenting. 🙂
I made this and it turned out super incredible. Thank you !
Oh I’m so glad! Thank you so much for reviewing!